DJI’s Mavic 3 Enterprise is the new workhorse for professional RTK drone photogrammetry. For the first time, you can now produce orthoimagery, point clouds, and 3D models with 1 cm accuracy from a drone that costs a fraction of the price.
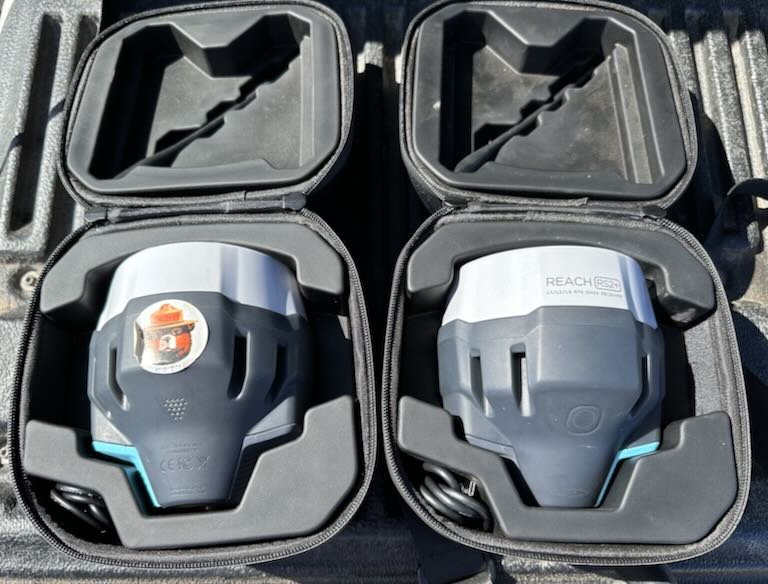
To get accurate position on the photos being taken by your drone, RTK with a local base station is important. Because the drone is usually flying at over 20mph, the GNSS position will often be off by several meters unless corrected via RTK / PPK. For this to be possible, you need to have a base station within close proximity to provide a fix. DJI advertises their D-RTK 2 unit, but this is expensive and does not provide the ability to get NTRIP-based RTK corrections. You will get good relative accuracy, but no absolute accuracy. Most importantly, you need to set ground control points throughout your site. Though your drone imagery has been improved by the RTK unit on the drone, the precision of an image taken from a drone moving at high speeds will not be as good as a stationary target measured on the ground. Instead, I recommend using two Emlid Reach RS2+ units. One will be your base station, and the other will be your rover for setting GCPs (ground control points).
With this setup, you use one RS2+ unit for a base station. If you have cell service, you can tether the unit to your phone, connect to an NTRIP base station, and get an accurate absolute position for your base station. If you do not have cell service, your base will not have absolute accuracy, but your drone and ground control points will have relative accuracy from your base.
Nonetheless, two RS2+ units is the simplest overall setup, because you set up a single base station. First, you broadcast corrections via LoRa to the other RS2+ rover. This gives you ~5km of range to set your GCPs. Then, you set your base to broadcast corrections via Local NTRIP, and this allows your DJI controller to connect to your base via WiFi, providing corrections to your drone.
This setup has worked well for me, and this guide outlines the steps I take to survey a site with my drone. I use these steps to improve my efficiency, and hopefully they will also help you. I also recommend referencing Emlid’s excellent documentation. Make sure you reference this in conjunction to my guide.
Setup Base Station
The base station will be the first thing you set up and the last thing you tear down. The base station will be used for setting your GCPs, as well as broadcasting corrections to your drone.
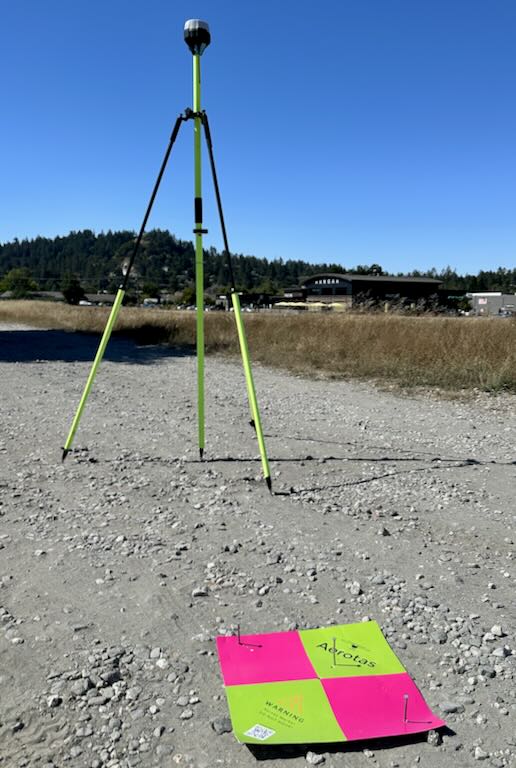
Setup the tripod and make sure that the pole is level.
Screw in the LoRa antenna. You will need this to talk to your rover and set GCPs.
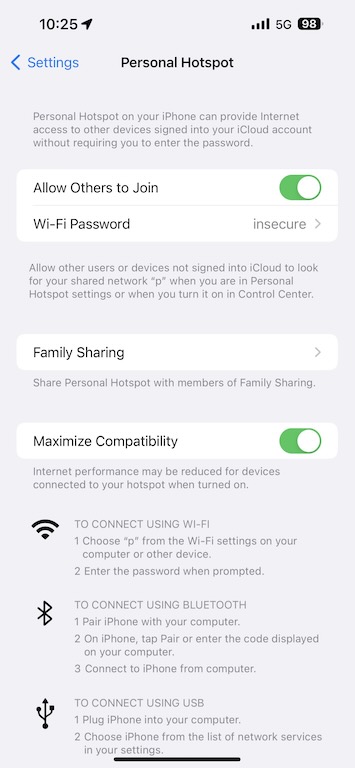
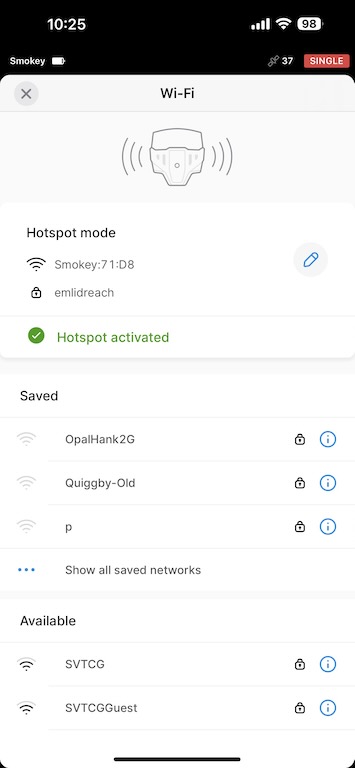
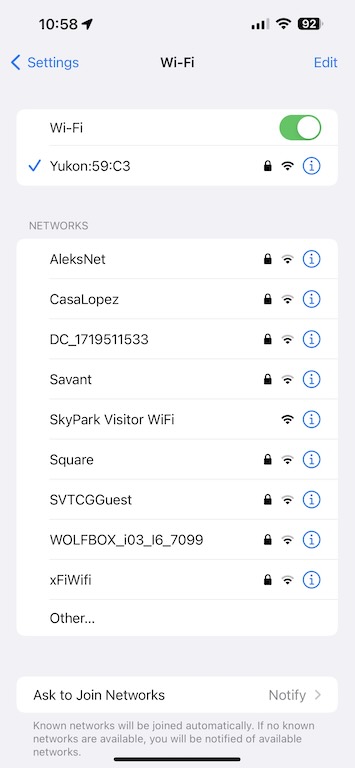
Turn on your Personal Hotspot on your iPhone. Enable Maximize Compatibility, as this will enable 2.4G instead of 5G, which the Emlid requires.
Turn on the Emlid RS2+ that will function as your base. If previously setup, the base should automatically connect as a client to your phone’s hotspot. If not, you will instead connect to your Emlid’s WiFi network and configure.
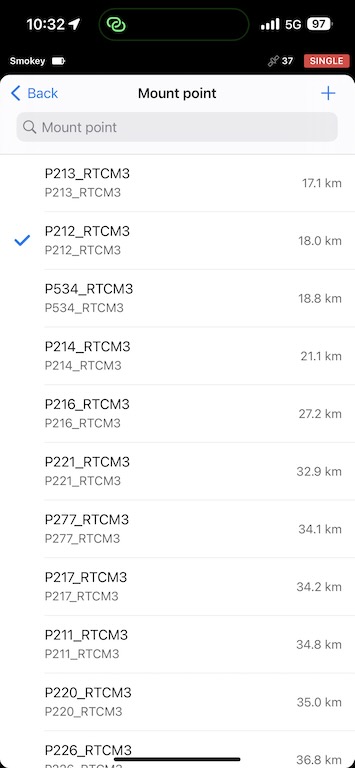
Connect to an NTRIP correction input. I recommend UNAVCO and RTK2GO if you are in the Western United States. When you sign up for either of these services, you will get credentials that you can put into the NTRIP Profile settings. These services are free.
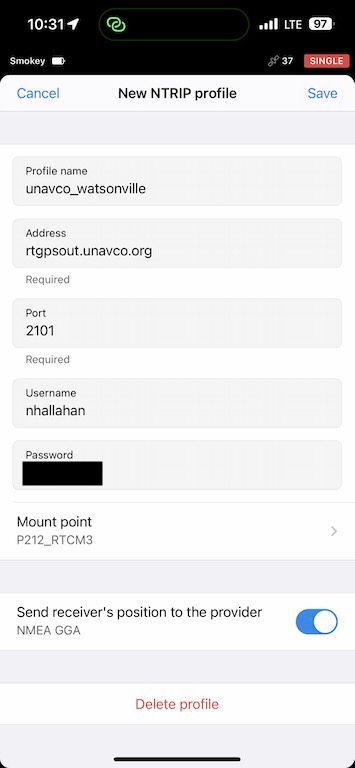
If your phone is connected to the internet, you can select a mount point, and it is best to choose the one that is closest in distance.
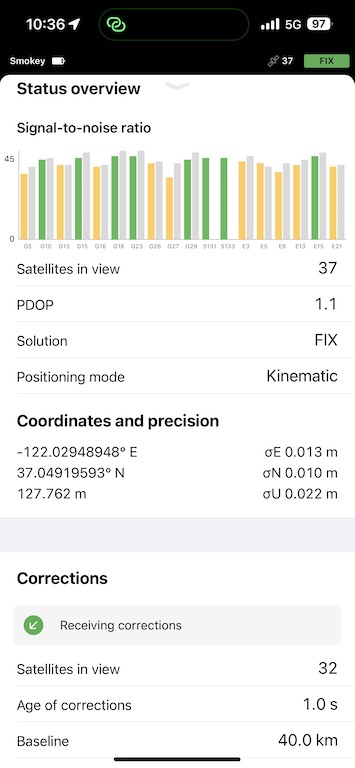
Once the connection is made, you should see in the status page that you are receiving corrections. Within a few minutes, your base should have a fix on it’s position. If it is taking too long, make sure that your base is in a wide-open space with a large field of view of the sky.
Connect Emlid Reach RS2+ to iPhone’s WiFi Hotspot
You should only have to do this on the initial setup of your base.
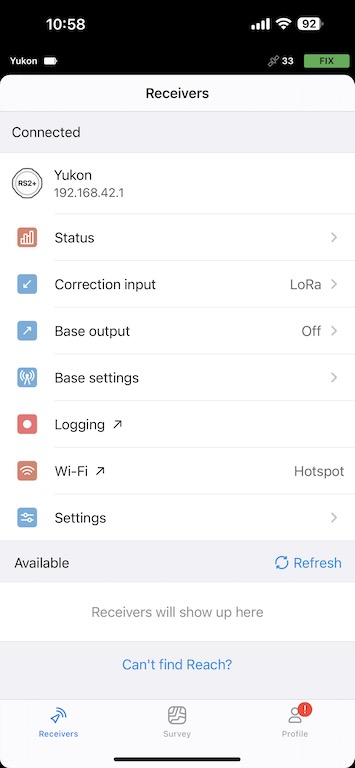
Click on the WiFi button on the Receivers view. Here you will choose your iPhone’s WiFi network.
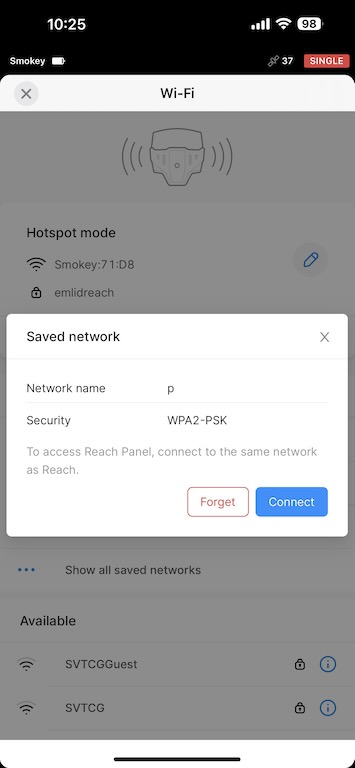
Your connection to the RS2+ will then be dropped. Make sure that your Personal Hotspot is on, and then the unit should automatically connect. If it does not work the first time, you may want to power on and off the RS2+. This part can be frustrating at times.
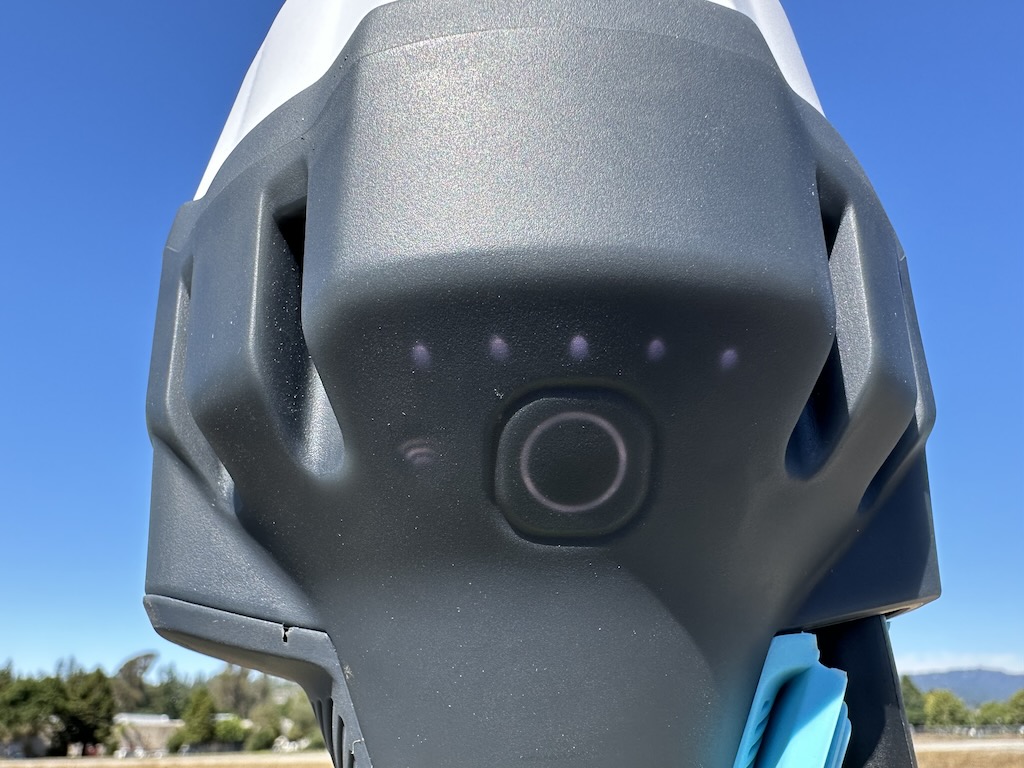
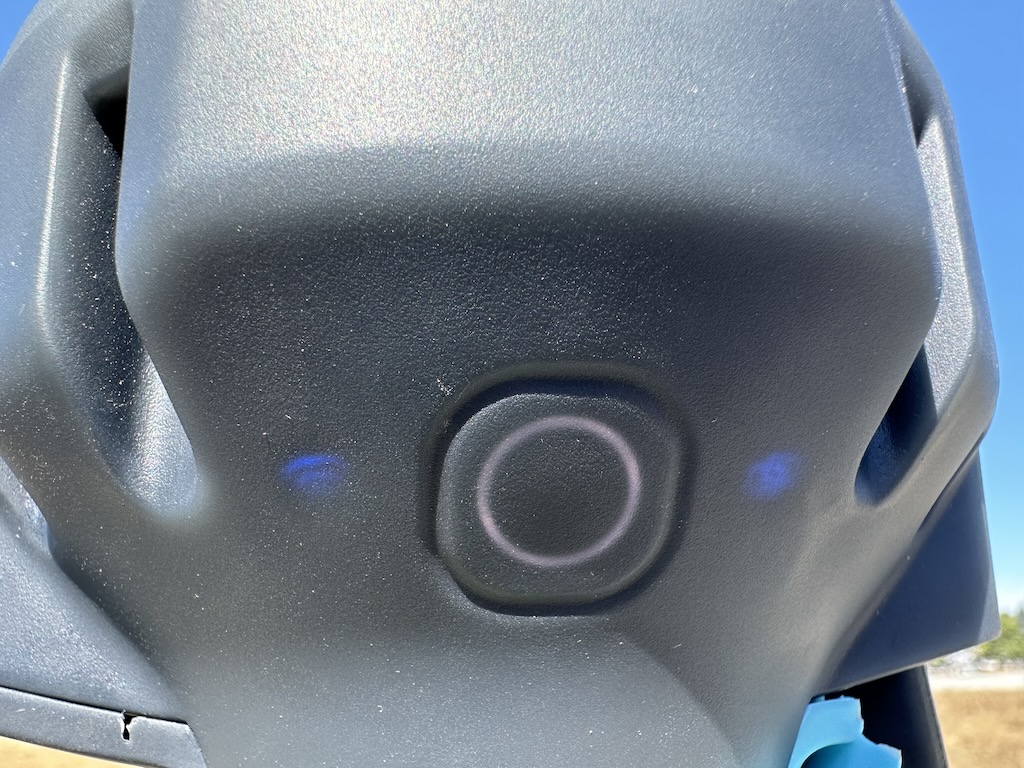
Note that when the unit is in Hotspot Mode, the WiFi LED is white. When it is in Client Mode, the LED is blue.
Setup base settings
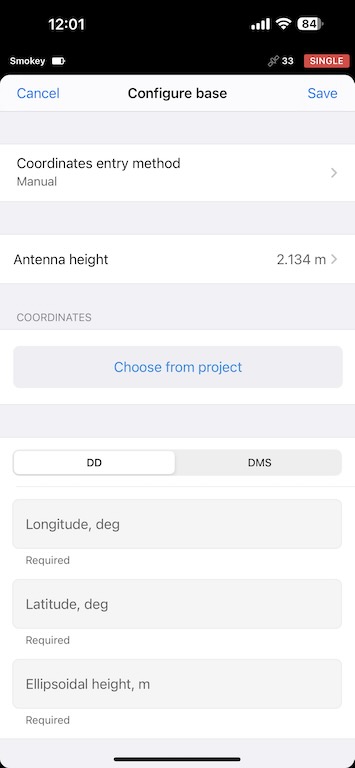
If you are getting corrections for your base via NTRIP, you should set your Coordinates entry method to Average FIX. I choose an Averaging time of 2 minutes, though that is up to you.
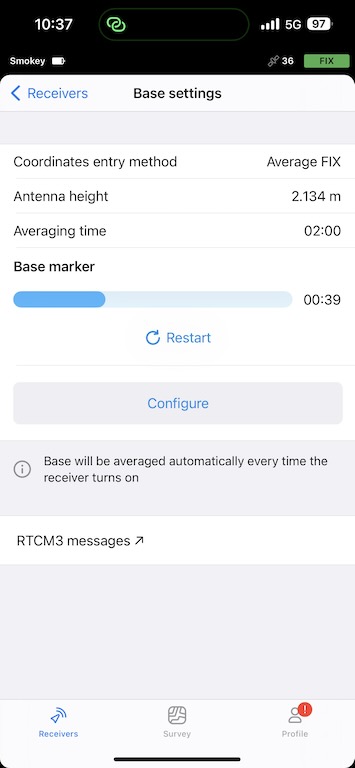
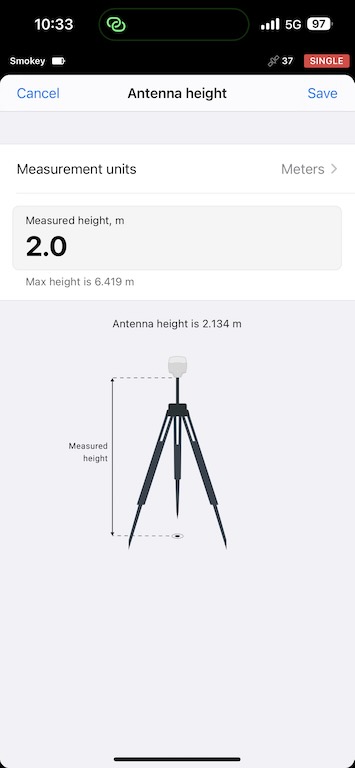
My survey poles are 2m tall, and you imput this into the Antenna height input, and the true antenna height is computed for you.
Sometimes you know the exact position of your base, or you are resuming your survey from a previous session and are setting your base on a previously collected GCP. In this case, you set your Coordinates entry method to Manual.
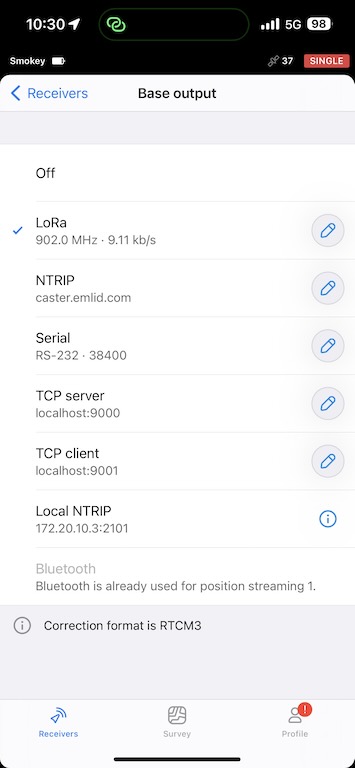
Set Base output to LoRa
Your rover will receive corrections via LoRa radio, so you need to turn this on for the Base output. Make sure the LoRa antenna is screwed into the base, and the LoRa settings should be the default (or whatever is specified with your country if you are outside of the United States or Canada).
Turn base back to Hotspot Mode
At this point you no longer need an internet connection, and later you will be connecting your drone to the base’s WiFi hotspot. Turn this on now, otherwise you will have to restart your base station later and manually input it’s location. This is important.
Setup Rover
The next step is to setup your rover and connect it to your base.
Power on your rover and connect your iPhone to the rover’s WiFi network. I gave my rover it’s own name, but it will be Emlid:XX:XX initially;
 .
.
Now in Emlid Flow you can refresh in the Receivers view, and you should be able to connect to your rover.
You will then connect to your base via LoRa for Correction input.
Setup Emlid Survey Project
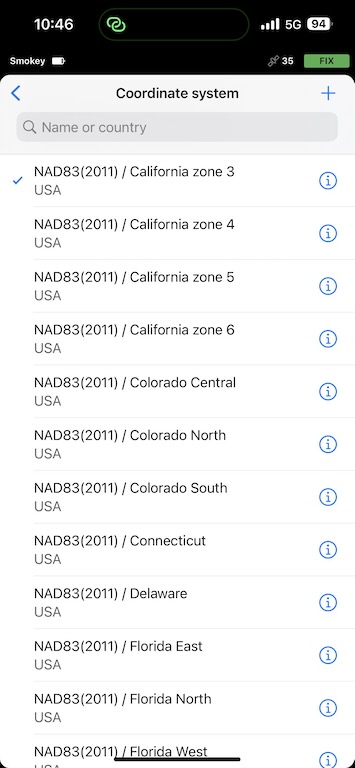
The Survey view in Emlid Flow is where you collect your points. You will create a new project, and here you choose your Coordinate system and Vertical datum.
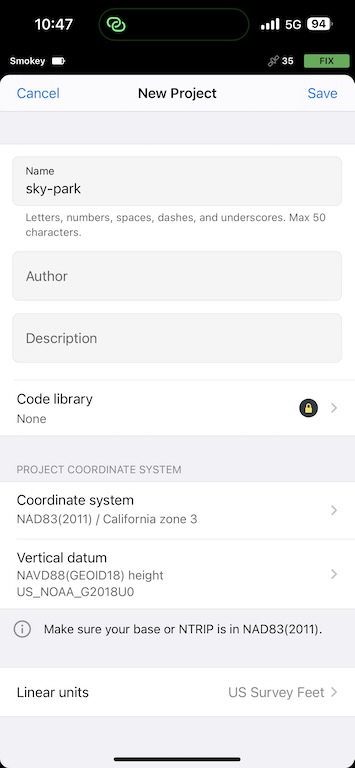
Because we are using a GNSS/GPS, your coordinates will be collected natively in WGS84, however, your survey / photogrammetry project is likely to be in the coordinate system appropriate to the location of your site. It is best to know what the official coordinate system is of your county / administrative area. This allows Emlid’s software to provide coordinates in the right CRS upfront, alongside WGS84. If you do not know, you will have to convert to your CRS manually yourself later.
As of 2023 in the United States, you probably will want to use NAD83(2011) with whatever state plane and zone you are in.
In Canada, you will likely want a UTM-based CRS such as NAD83(CSRS) / UTM zone 8N.
In the United States, your vertical datum will most likely be NAVD88(GEOID18).
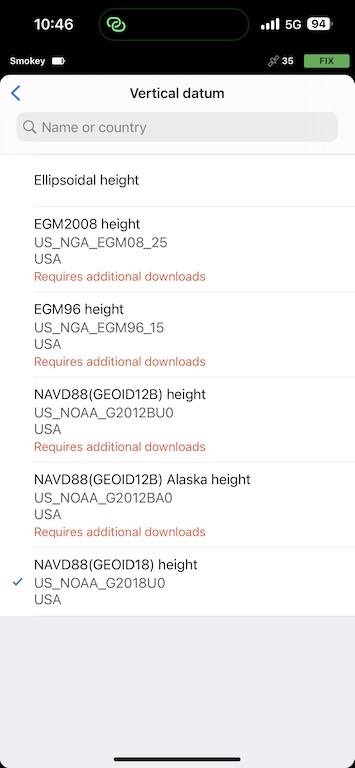
In Canada, it will likely be CGVD2013(CSRS).
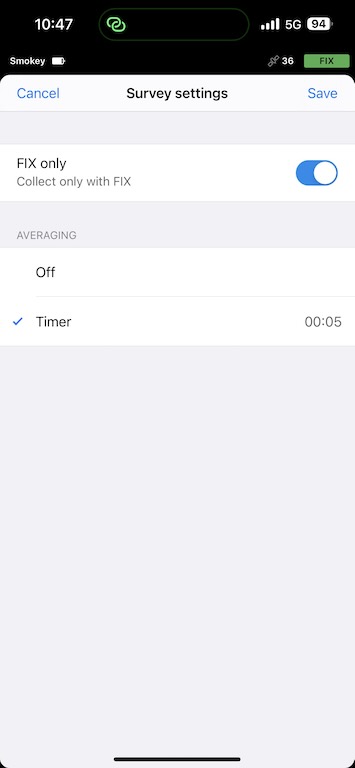
Finally, when you collect your point, you should set your Survey settings to FIX only so that you are collecting only valid points. I also set my averaging to 5 seconds so that any wobble to my leveling is mitigated.
Set Ground Control Points
This is the most time-consuming part of the job. You will have to walk around your site and set GCPs interspaced over the area and at the edges.
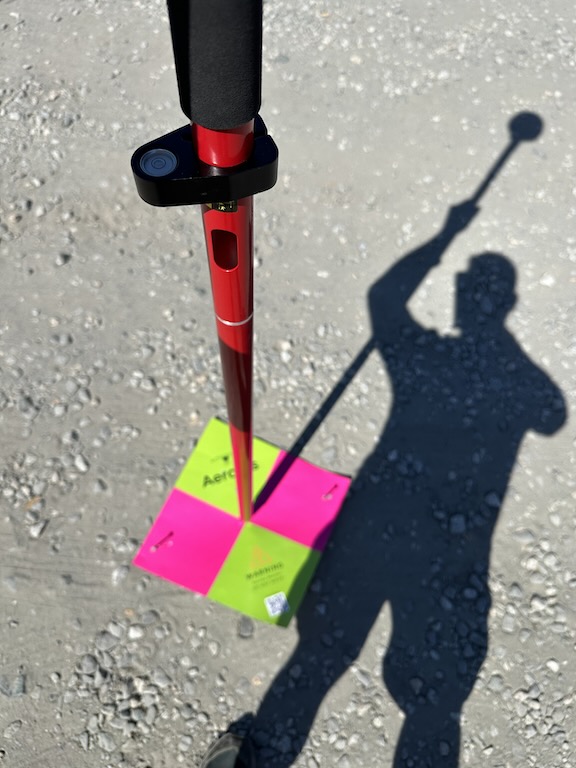
I like to set my first GCP close to the base station so that I have a known point I can use to set my base station again if I need to come back the next day.
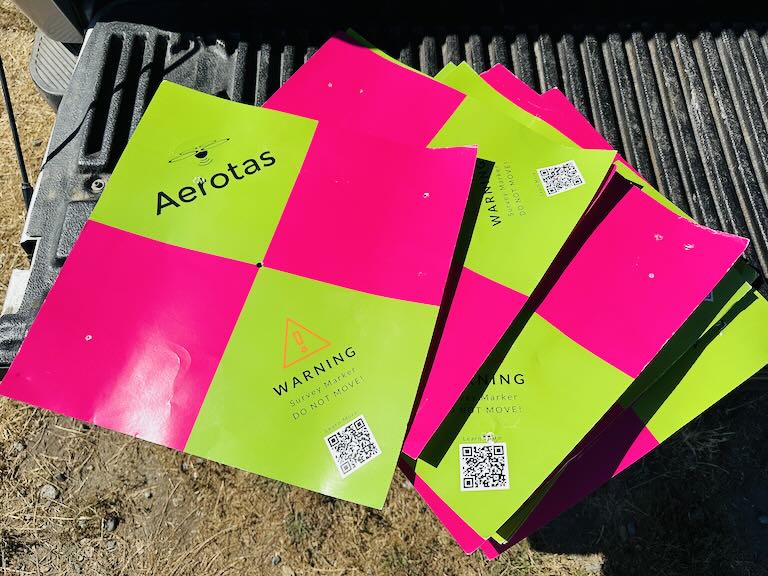
I take two approaches for my GCP targets. If I am on grass or dirt, I use cardboard targets like these:
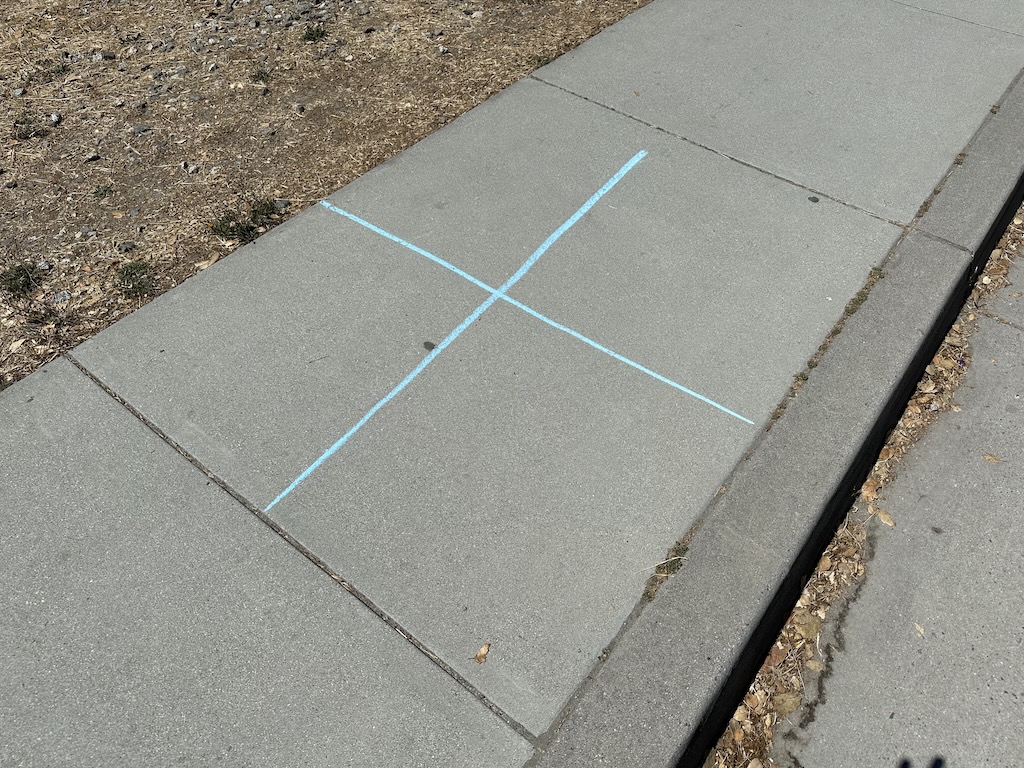
However, it is more convenient to use chalk on pavement whenever possible.
Plan Automated Flight in DJI Pilot 2
Many people like to plan the flight beforehand, but I find it more practical to set up the route when out in the field. There are often unforeseen obstacles, and the specific heights of buildings, power lines, trees, and other features cannot be easily determined in advance. Instead, it is more helpful to fly a reconnaisance mission to figure out sensible parameters for your flight plan. You will take your drone up to the confines of the area you want to fly. Then, you will find any obstacle and fly above it. This way, you can lower the drone to a reasonable height above your obstacle to determine a safe altitude for your flight path.
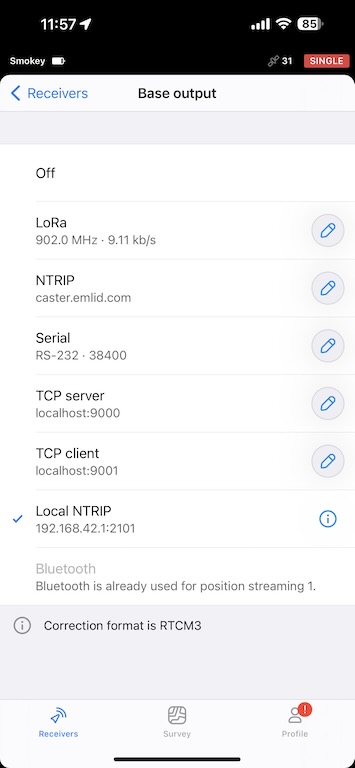
Set base output to Local NTRIP
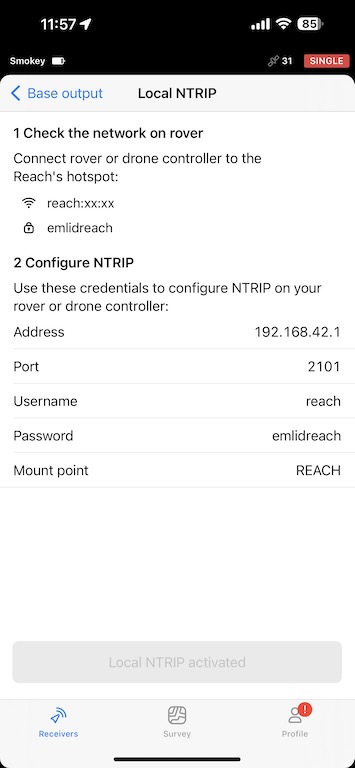
You should now connect to your base’s WiFi on your iPhone and set your Base output to Local NTRIP.
Connect DJI Controller to Base
Your drone gets its RTK corrections from the base via the controller. The controller connects to the base’s WiFi hotspot and recieves corrections through the Local NTRIP network. Then, the controller relays these corrections to the drone via its proprietary internal radio connection.
So, connect your controller to the base’s WiFi network. You can get to this screen by swiping from the top left of the screen of your controller.
Then, you will go into the RTK settings within DJI Pilot 2 and enter your Local NTRIP credentials. This is where people tend to get stuck. You must be connected to your base’s WiFi network, your base must have a FIX, and your drone needs to be in an open area receiving good GNSS signals. If these three things are not true, you will not get a FIX. Instead, you will get the following message: RTK signal weak. Unable to take off.
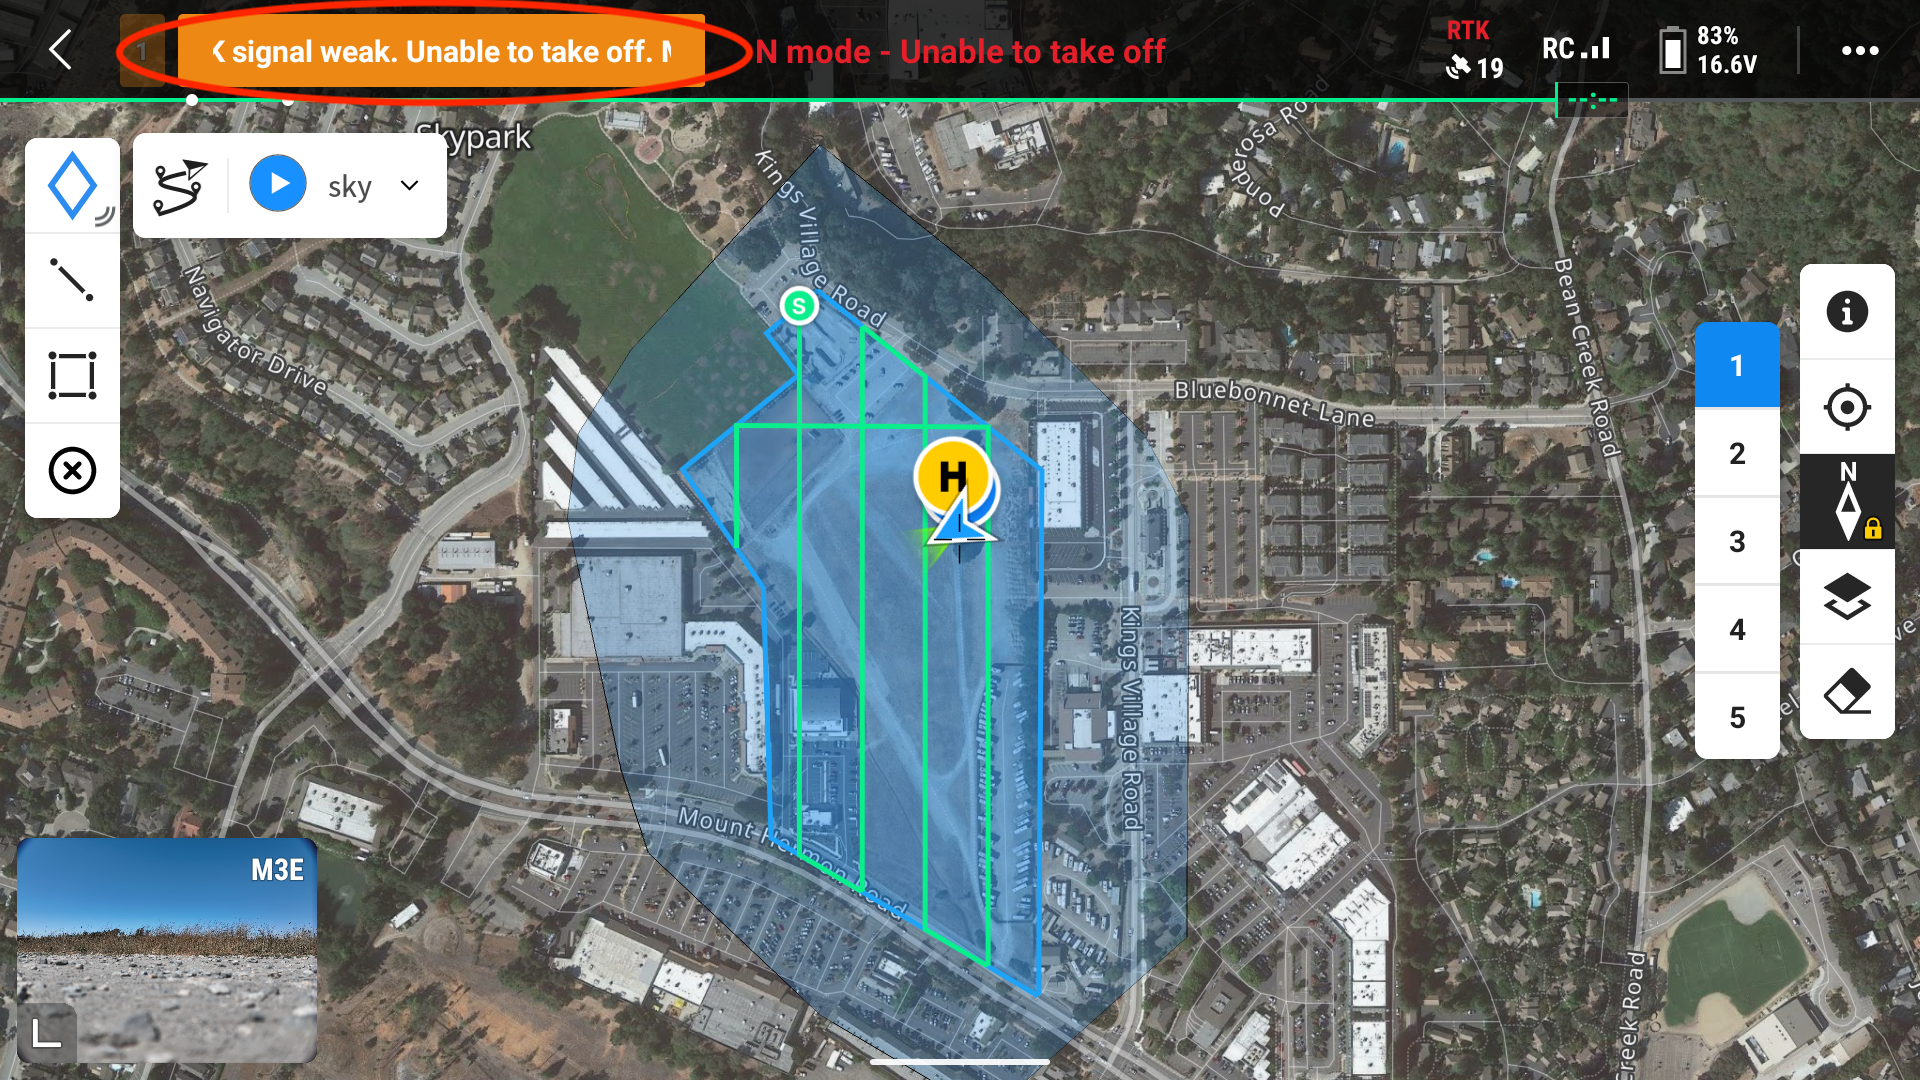
This message is painfully non-descriptive. Most likely, you need to check:
- Is the DJI controller connected to the base’s WiFi Network?
- Does the base have a FIX on its location, or is the location entered manually?
- Is the drone in a wide-open area with good GNSS signal?
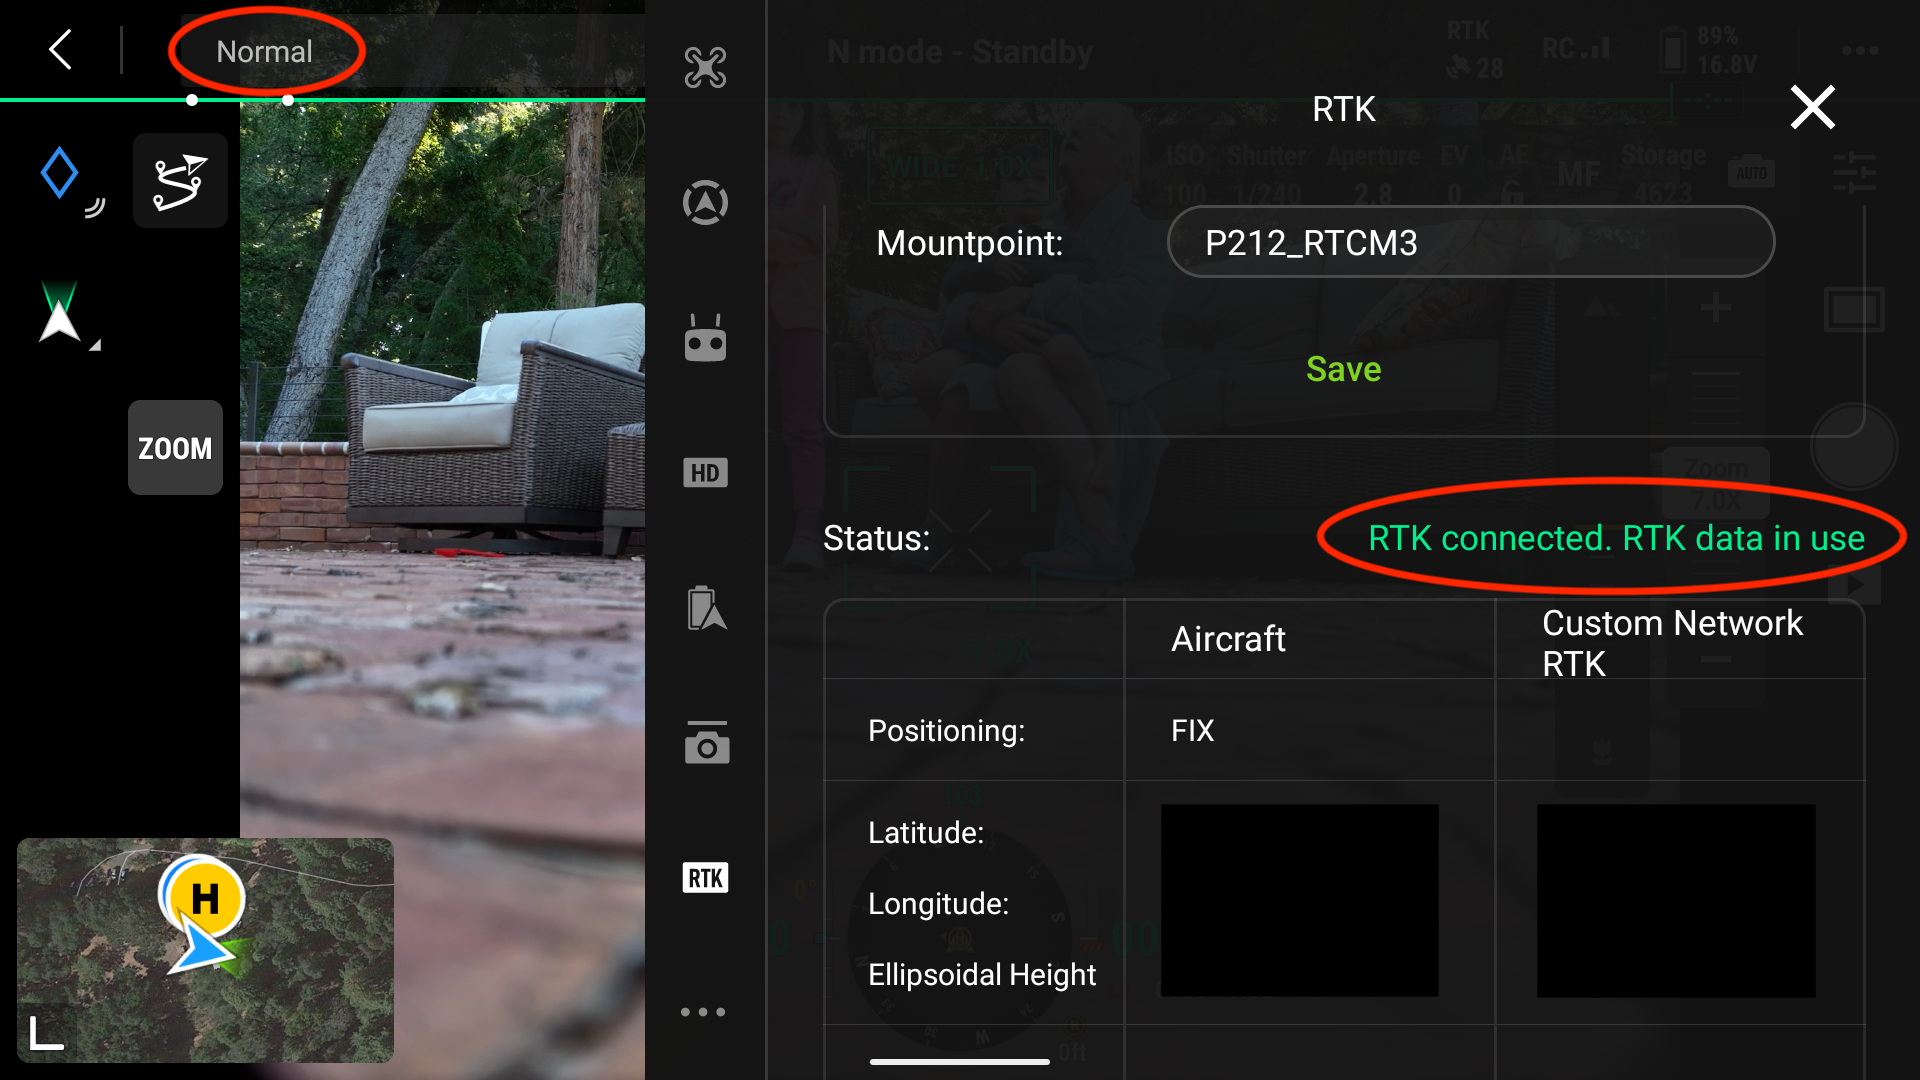
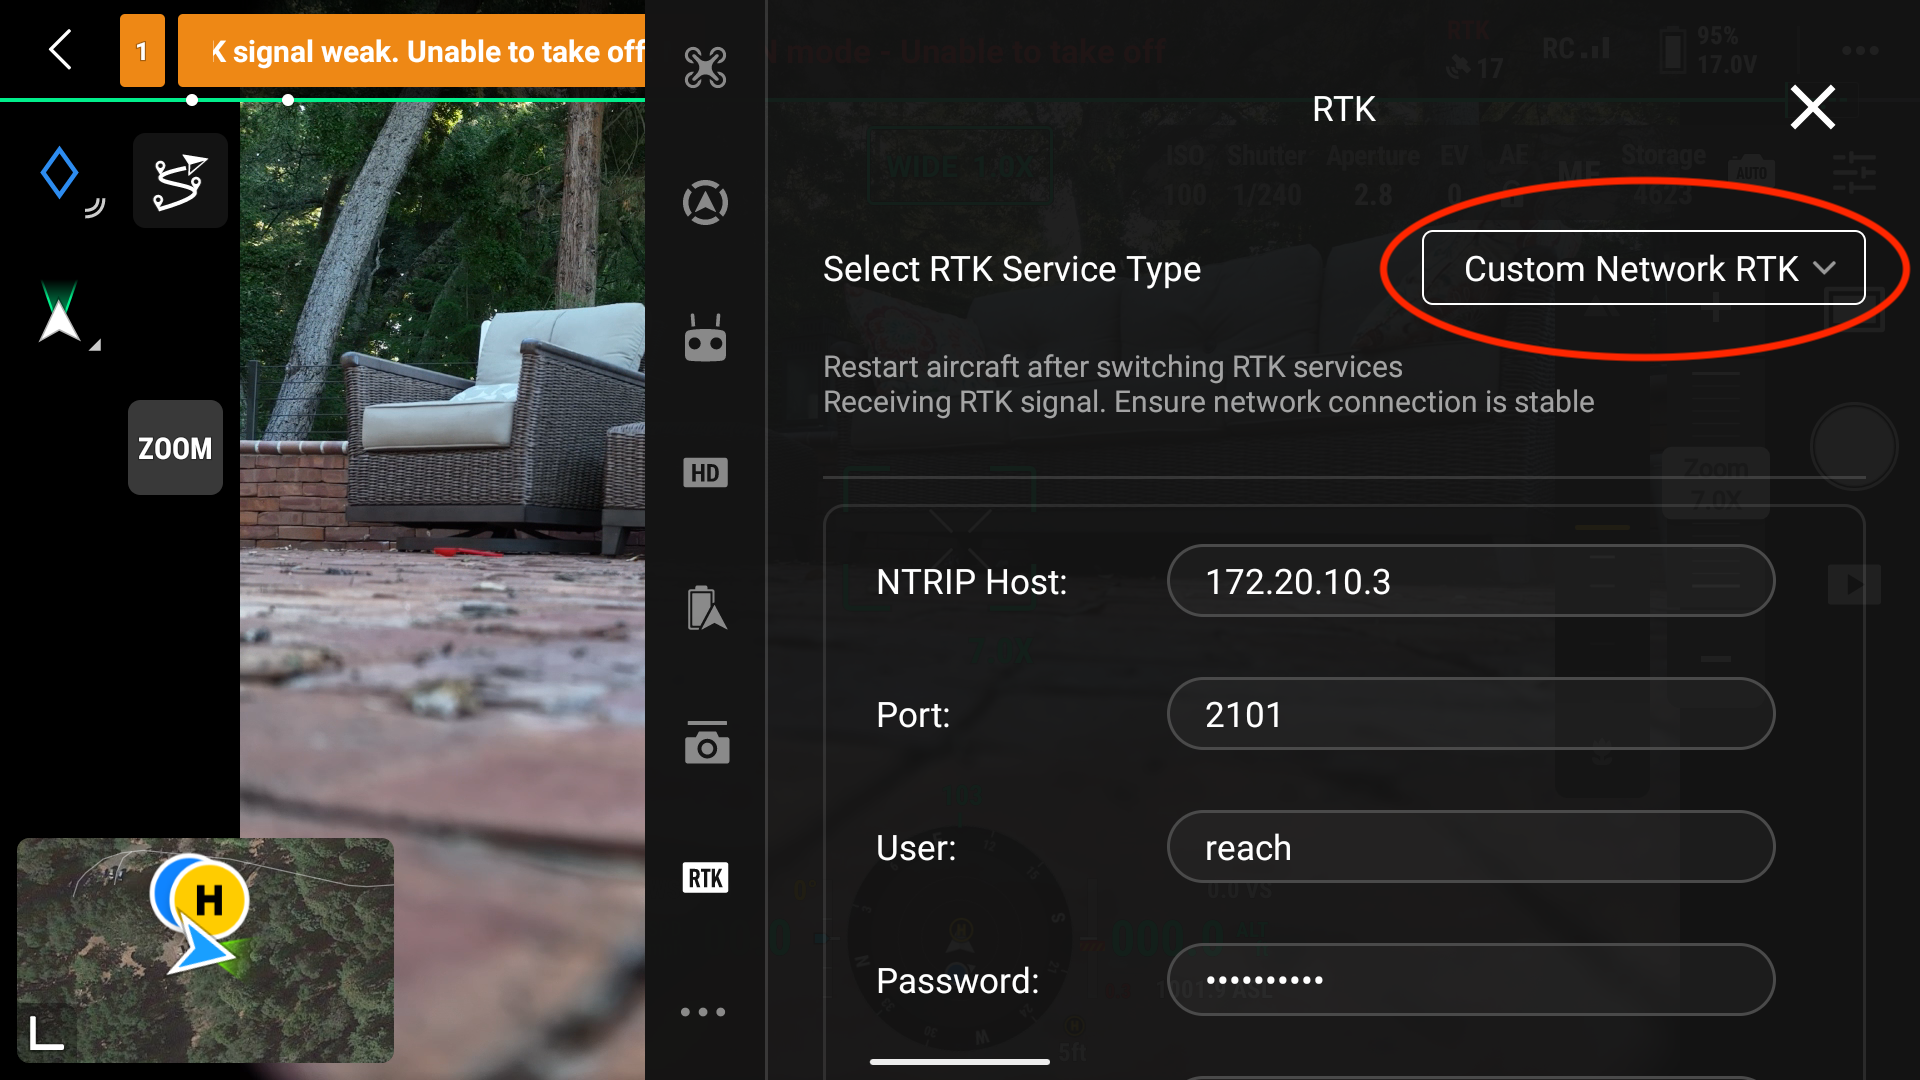
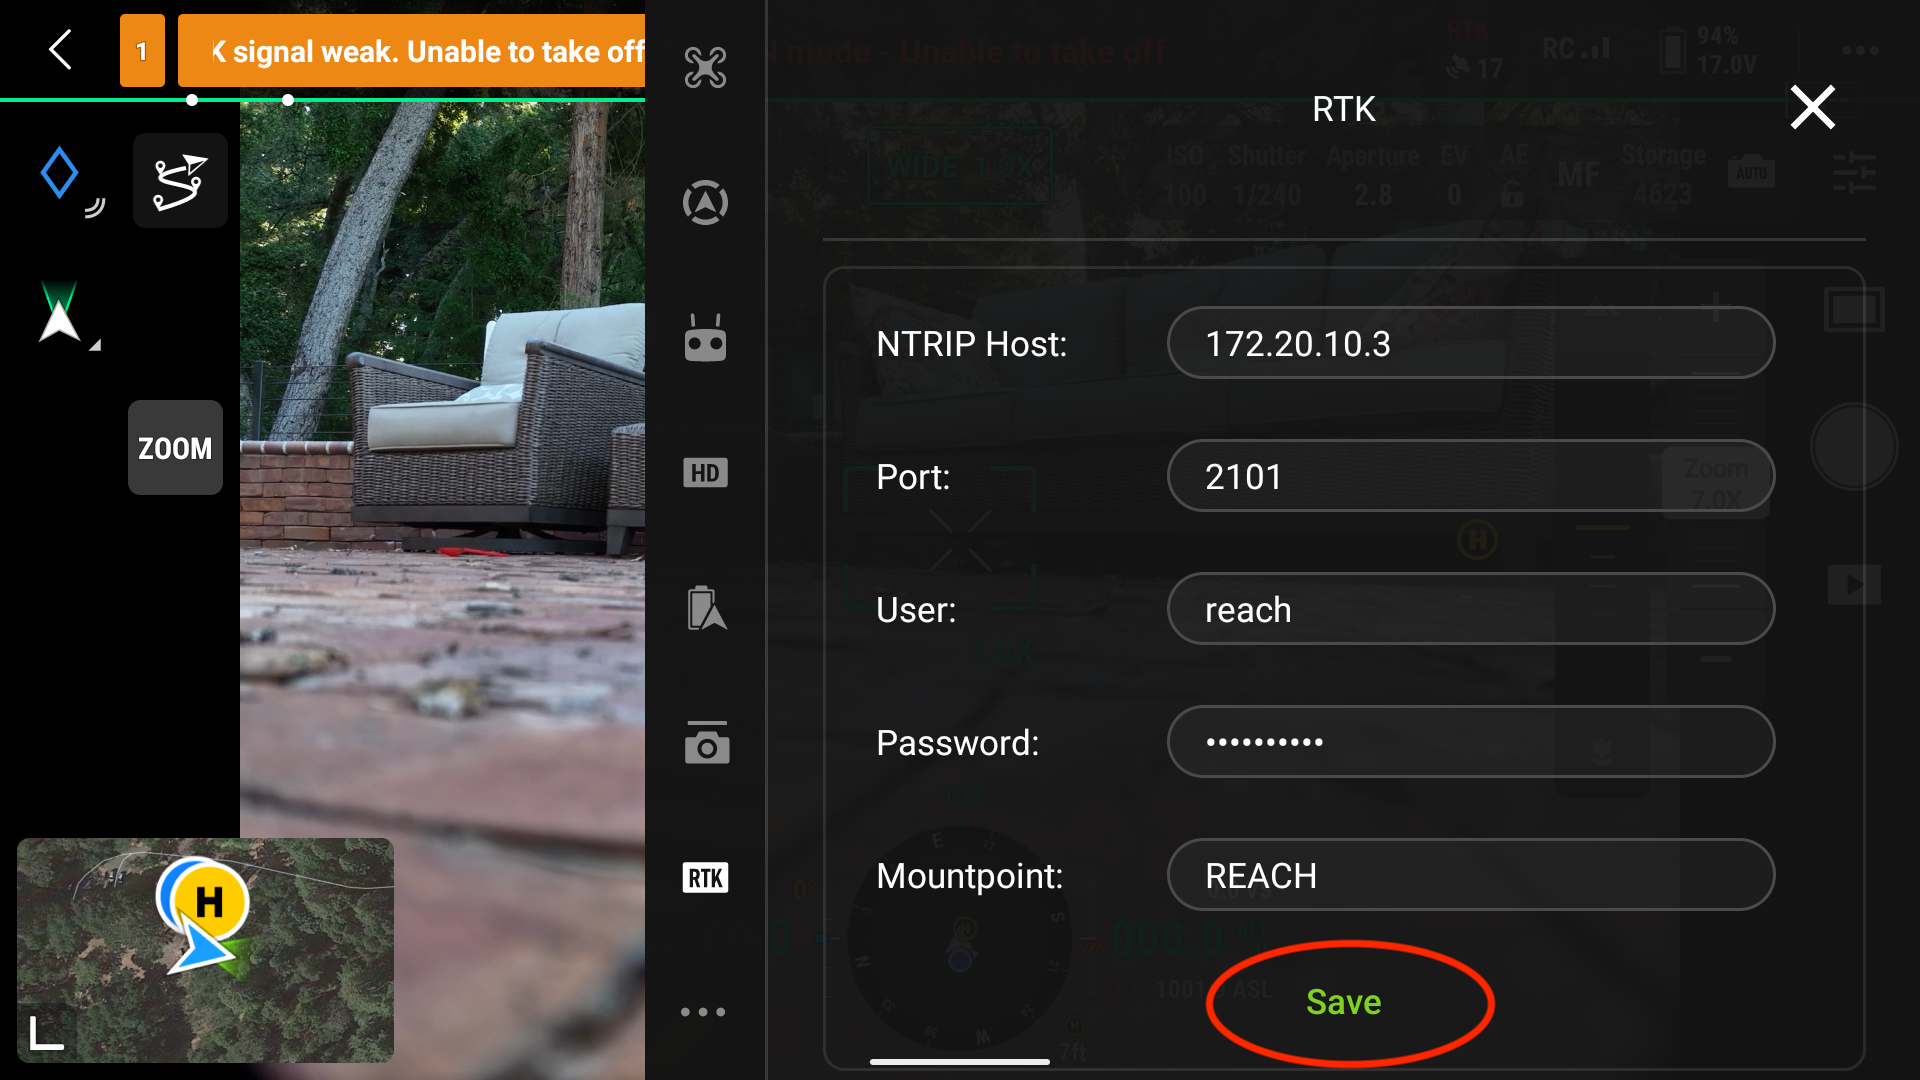
You will need to enter the credentials provided previously in Emlid Reach. You select Custom Network RTK as shown below. The NTRIP Host IP address varies, so make sure this IP address is correct.
Another trick I have noticed is that if I want the controller to check again for NTRIP corrections, I press the Save button again. It may then resolve and show that we are ready to fly.
When the RTK connection is working, you should see in the status RTK connected. RTK data in use. Also, you should see in the top left corner Normal.